Drum heads are some of the most complicated and frustrating things to tune when you get started. There’s really not a pitch to tune it to like there is with any other instrument. The standards and recommendations change wildly depending on the style of music you play. Every drummer will have a slightly different take on what drums heads they like and how they tune them.
In this article we’re aiming to cover the basics, what you need to know, as well as some quick tips on how you can make even the cheapest drums sound good.
What You'll Need
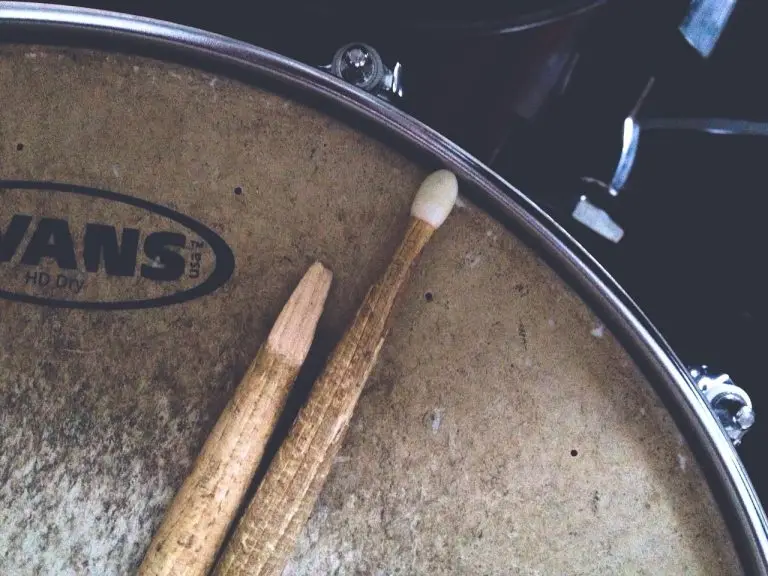
1. Drum Key
A drum key is like a custom wrench just for the drums. It is used to tighten the lugs on a drum shell which in turn adjusts the pitch of the drum head. Drum keys are also often used to tighten or adjust other parts of your drum set including kicks drum pedals, hi-hat stands, snare stands, and tom arms. Having one of these is almost as essential as having drum sticks. Fortunately they are very cheap and can often be stored somewhere on the drum set or (in my case) on a keychain.

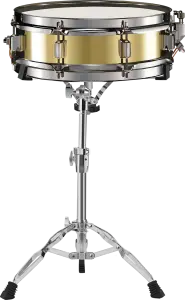
2. Drum Heads
What drum head you choose will depend a lot on the style of music you play as well as personal preference. Lots of manufacturers have various models and terms for what their drum heads claim to offer. The three drum head manufacturers that come to mind for me are Remo, Evans, and Aquarian. These brands are very popular and used by professional drummers across the globe.
While there are many types offered, the two main catagories are coated and uncoated drum heads. Coated drum heads are usually a little more warmer while uncoated usually have a bit more attack to them.
You’ll also need a head for the top of the drum as well as the bottom of the drum. Each has a different role which we will get into during the tuning part of the article.
Drum shells are measured in inches. If you’re not sure what size your shells are, it’s as simple as pulling out a tape measure and finding out. Average shell sizes are as follows:
- Kick Drum – 22 inches
- Snare Drum – 14 inches
- Rack Toms – 10,12, and 13 inches
- Floor Toms – 14 and 16 inches
If you’re not sure what heads to go with, a strong place to start would be Remo Ambassadors. I’d recommend starting with coated for the top heads and uncoated for the bottom heads. These are a nice balanced set that can work with almost any style. The other idea worth considering is looking up your favorite drummers and finding out what they play. Often big drummers are sponsored and will happily share what parts they use on their kit.
When Do You Need To Replace Drum Heads?
Different drum heads will need to be replaced at different times. The top drum heads will need to be replaced more often. How often depends on how much you play. You may need to replace the top heads any where from once a year to every three months. Every three months would be if you are playing for over an hour a day while once a year would be much less.
Bottom heads need to be replaced about once every three top head changes. That might mean every nine months to three years. Because bottom heads don’t take a direct beating like the top heads do, they aren’t as prone to wearing out and can be changed much less frequently.
Drums don’t have to break to need replacing. Often they will get dirty or start to wear thin which causes them to lose their luster. If a drum head starts to sound very dull or thin, it’s time to replace it and probably the rest of the heads with it.
Replacing Drum Heads
I recommend reading this entire article before replacing your drum heads. Do not try to replace your heads while reading this for the first time.
Step 1: Remove Old Drum Heads
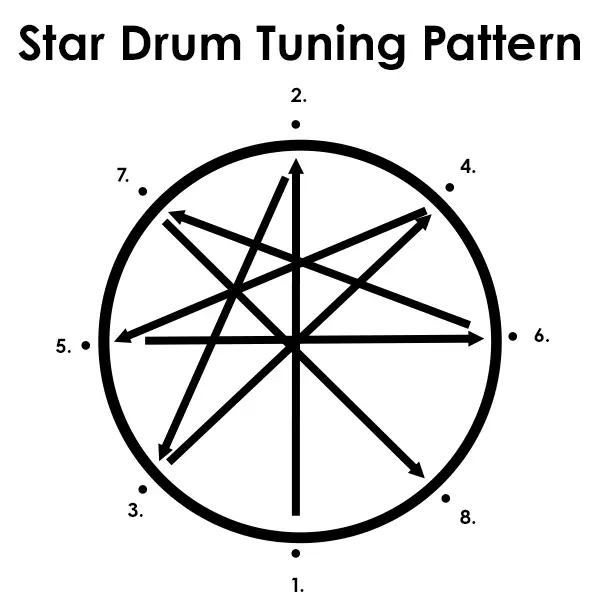
Remove the old drum heads by loosening the drum screws around the rim/hoop of the drum head. Loosen each screw one or two times and then move across the drum head. Continue in a star shaped pattern until the drum screws are loose and you can remove them by hand. The purpose of unscrewing the drum head like this is to not warp or damage the edge of the shell. The edge of the shell makes sure your drum head resonates like it’s supposed to and applying uneven tension can cause the drum shell to get damaged and create uneven resonances.
After unscrewing all of the drum nuts, the hoop/rim should come off and the drum head should be easily removed. You can choose to remove one drum head at a time or both drum heads. It’s up to you.
Step 2: Place New Heads On The Shell
When putting on the new drum heads, it’s important to make sure that the edge of the drum shell is nice and clean. You may want to take a soft towel or washcloth and wipe down the bare edge of the shell to make sure there are no wood shavings.
After the shell edge is clean, place the new head on the shell. Try to keep the head as centered as possible.
Next, start putting the drum screws in the shell one at a time. Only make them finger tight. Don’t use the drum key yet. Add them in a star shaped pattern similar to how we removed the drum head. Once they are all finger tight, now we can start tightening the drum screws with the drum key. Only apply a half rotation turn at a time, continuing in our star shaped pattern.
Keep doing this until all of the wrinkles are removed from the drum head. You may find that after a few rotations, only one side or one or two screws only have wrinkles next to them. You can begin to abandon the star pattern and tighten those individual sides until the drum heads are without wrinkles.
Step 3: Stretch The Drum Head
Now that we’ve got our drum head seat properly, it’s time to stretch the drum head out. Make your hand into a fist and place it as close to the center of the drum head as possible. Begin applying weight to the drum head. You may hear some crackling, this is normal. You are just stretching out the drum head so that once you get it in tune, it’s more likely to stay in tune. You may also see wrinkles appear in the drum head again. This is also normal and will simply mean you’ll need to retighten your drum screws again.
Step 4: Tuning The Drum Head
Now that we’ve got the drum head stretched, we can finally begin tuning the drum head. Our first goal is to get each side in tune with each other.
Place a finger or two in the center of the drum head. Now take your drum stick and hit the edge of the drum head next to the drum screw. Repeat this step with the drum screw directly across from the first drum screw you hit (yes we’re doing the start pattern again). Compare those two pithes. If one side sounds lower than the other, tighten the screw next to the lower sounding side to raise the pitch. Try to get the two sides to match.
Now repeat this process with the two screws clockwise from the previous two screws you tuned. Try and get those two to match by turning in very small increments. Think one eighth turns or smaller. Repeat this process until you’ve gone all the way around the drum head.
Finally we need to get all of the screws to match each other so that the entire head is in tune with itself. Once you’ve done that, we can move on to the hardest step.
Step 5: Bottom Head vs. Top Head
This is where most of the stylistic preference comes in to play. The relationship between the top head and the bottom head might be the most important factor. The top head controls the pitch of the drum but the bottom head controls the resonance and sustain. What you choose to do is ultimately up to you but here’s a general rock tuning to get you started.
Kick Drum and Toms
With both heads independently in tune, lower each screw a half turn at a time until you begin to see wrinkles again. Raise the top head to a whole turn at each screw and the bottom/resonant head a half turn by each screw. Check that each head is still in tune with itself. You want to avoid both heads being tuned to the same pitch as this will cause excessive ringing which is not a rock drum style. By having the bottom/resonant head tuned lower, we’ll increase the deep feeling and sound we get from the drum while also helping reduce the amount of sustain we get from the drum. If the drum heads are too loose, you’ll get a plastic sounding drum with no warmth to it. If the drum rings too much, consider lowering the bottom head first and then the top head.
Snare
While we still want the resonant head to be lower than the top head, the top head of our snare will get a lot more high pitched. The top drum head should take a total of 3 or more turns after seeing wrinkles while the bottom head can still see only a half to one turn. We still want the depth of the snare drum but we also want to feel the crack of the snare as well. I high tuned top head will help ensure that in addition to so well adjusted snare wires. Make sure your snare wires aren’t too loose or too tight. We want the sustain of those snares to match the natural resonance of the shell so it feels like one unit.
Step 6: Controlling Resonance
Let’s be honest, there’s a difference between high quality shells and low quality shells. Some shells, no matter how well you tune them will be near impossible to get sounding good through natural tuning methods. This is usually where we want to control the resonance so you’re hearing more of the initial impact and we can control the sustain. Here are a few tools and tips that can help with that.
Put A Pillow Or Blanket In The Kick Drum
Putting a pillow or blanket in the kick drum helps create that heavy thud while keeping the sustain to a minimum. You don’t want to overdue this. Your blanket or pillow should just barely touch both sides of the drum but not take up more than 25% of the space inside the shell. Theres a fine line between dampening and deadening.
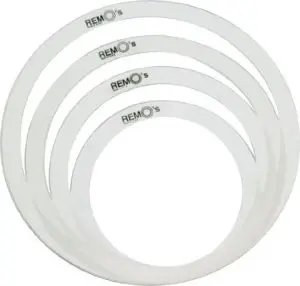
Drum Dampening Rings
These little plastic drum dampening rings are a nice easy way to keep your drums in check. They come in different variations from rings that lay on top to pads that go inside the drum shell. They’re also usually pretty cheap but they do require that you get the exact size to fit your shells. They also don’t offer anything in the way of customizing for how much dampening you want. You kind of get what you get but they are very simple to use and provide a consistent reduction around the head.
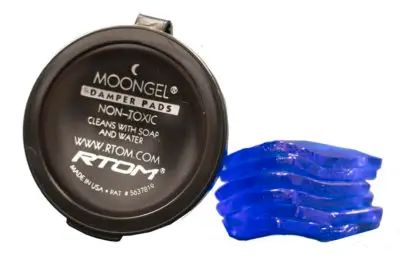
Moon Gel
Moon Gel are little jello like pads that adhere to your drum heads. You can choose where to put them on the head, put multiples on one drum or cut them up to reduce how much they are dampening. They are relatively the same price as the dampening rings and come with four gels to a pack. While they are much more customizable, they do have their down sides. If you leave them out long enough, they can dry out and loose their adhesive quality. Even if you try to preserve this and put them back in the case all the time, they will eventually get dirty enough that they will lose their adhesiveness anyways. They can also leave a blue stain if you leave them in one spot on a drum long enough.
Gaffer's Tape
The tape with a million and one uses for a musician. Using gaffer’s tape is a technique I see even the pros use. It doesn’t offer as much dampening but you can always add more tape, it won’t stop adhering, and a role of tape can last you a long time. Some people swear by it, especially some of the studio guys.
Trial and Error
Learning how to tune your drums is a very difficult task. Way more difficult than I think most people understand when they first get a drum set. While there are plenty of ways to do it, each persons taste and style will have you mixing up what heads and techniques you choose to use. My best recommendation is to start with this technique and then if you aren’t happy with it, look up some more techniques online. Goodness knows there’s always a new one showing up every other week.
I hope this guide was helpful for you. Best of luck on your drumming journey!
More Posts